Securely Setup OpenClaw Clawdbot in Minutes

What if you could set up OpenClaw Clawdbot in just minutes - without the headaches or risk? Most guides on how to securely setup OpenClaw Clawdbot skip the messy details. They miss the real pain: missed dependencies, weak server choices, and bot errors that leave your data exposed. You deserve a clear path that puts your security first and saves you time.
OpenClaw Clawdbot can run on Windows. But there's more to it than just clicking "install." You need the right tools, accounts, and know-how. Choosing a secure host matters. Your first setup steps decide everything. Get them right, and you're safe. Get them wrong and you're exposed. A Composio (opens in new tab) analysis reveals why attackers target misconfigured bots. Small mistakes become big problems fast.
Host selection is your first key decision. Discounts like those often available for Hostinger VPS can help you get started, but the real advantage lies in rock-solid isolation and control. That's why experienced admins skip standard shared hosting for dedicated VPS solutions. Your bot stays protected, and performance remains consistently high even under load.
In this guide, you'll get step-by-step instructions to securely setup OpenClaw Clawdbot from scratch. You'll see exactly which tools to install. You'll learn which accounts to create. You'll avoid common pitfalls. We'll cover OS compatibility - yes, Windows is supported. We'll check hardware needs. You'll learn how to pick a secure host that won't let you down.
Ready for a walkthrough that skips jargon and cuts straight to what works? You'll solve the technical puzzle piece by piece. You'll see progress at every stage. By the end, you'll have OpenClaw Clawdbot running safely on your chosen platform with confidence. Stick around. You're about to take control of your automation journey the right way.
Prerequisites
Check these before you begin:
System Requirements:
- Windows 10+, macOS 11+, or Ubuntu 20.04+
- 4GB RAM minimum (8GB recommended)
- 20GB free disk space
- Active internet connection
Required Accounts:
- Docker Hub account (free tier works)
- GitHub account for downloading config files
- Cloud hosting account if deploying remotely (Hostinger, AWS, or DigitalOcean)
Tools to Install First:
- Docker Desktop (Windows/Mac) or Docker Engine (Linux)
- Text editor (VS Code, Sublime, or Notepad++)
- SSH client for remote access (built into most systems)
Knowledge Level: You should be comfortable using the command line. You should know how to navigate directories. You should understand basic file permissions. If you've deployed a web app before, you're ready.
Security Prep:
- Have a password manager ready (1Password, Bitwarden, or LastPass)
- Know your server's IP address if deploying remotely
- Set up two-factor authentication on all critical accounts
Check each item above before moving to Step 1. Missing even one can cause setup failures or security gaps later.
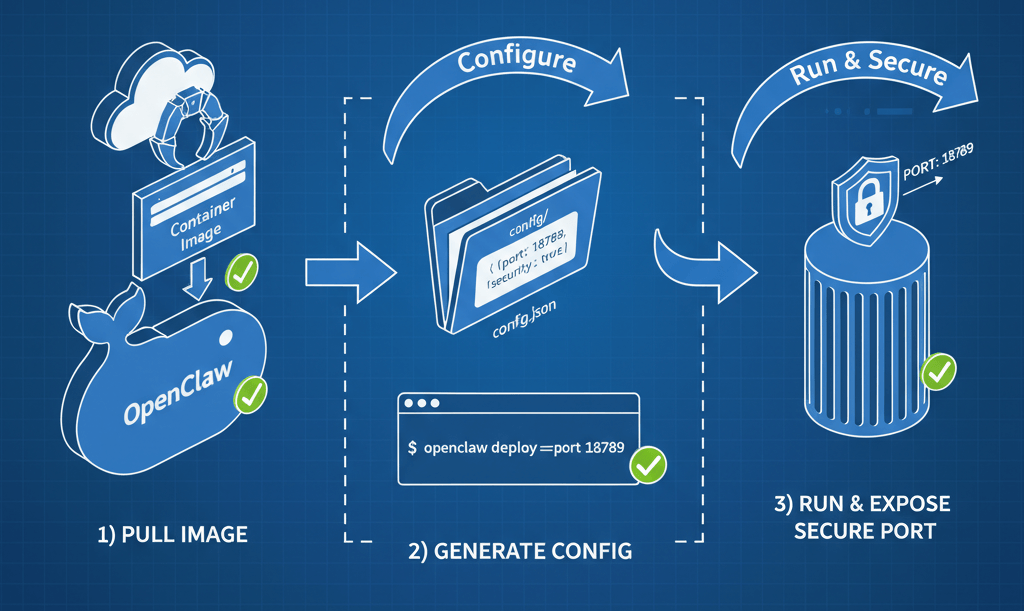
Step 1: Securely Setup OpenClaw Clawdbot
Download and Install OpenClaw Clawdbot
Start by installing OpenClaw Clawdbot on your server or local machine. You'll use Docker for a fast, repeatable setup. This method works across Windows, macOS, and Linux.
- Pull the latest OpenClaw image from Docker Hub:
```bash
docker pull openclaw/clawdbot:latest
``` - Create a working directory for config files:
```bash
mkdir ~/openclaw-config && cd ~/openclaw-config
``` - Initialize the config using Docker CLI:
```bash
docker run --rm -v $(pwd):/config:Z openclaw/clawdbot:latest openclaw config init
```
You should now see config.json in your working directory.
- Launch the bot with internet access enabled. Replace
<YOUR_PORT>as needed:
```bash
docker run -d \
--name clawdbot \
-p <YOUR_PORT>:8080 \
-v $(pwd)/config.json:/app/config.json \
openclaw/clawdbot:latest
```
At this point, your OpenClaw instance is running and ready to configure.
Checkpoint: Verify that docker ps shows "clawdbot" as an active container before moving forward.
If you prefer a one-command install, follow the Youtube tutorial (opens in new tab). It walks through deploying OpenClaw in Docker with secure defaults set out-of-the-box.
Protecting Your API Keys During Setup
Configuring API keys is where most security mistakes happen. Data from Composio (opens in new tab) reveals 12.8 million secrets leaked on public GitHub in 2023. That's a 28% increase over last year. Exposed keys can lead to data breaches or lost funds within hours.
To securely setup OpenClaw Clawdbot:
- Store all sensitive API keys in environment variables. Never hard-code them into
config.yaml. For example:
```bash
export OPENCLAW_API_KEY="your-secure-token-here"
``` - Reference these variables inside your config file using supported syntax. Use
${OPENCLAW_API_KEY}format. - Restrict permissions on both your config directory and environment variable files:
```bash
chmod 600 config.yaml
chmod 700 ~/openclaw-config/
``` - Use a secrets manager like AWS Secrets Manager or HashiCorp Vault for production workloads.
- Always rotate credentials every 90 days. Or rotate immediately if staff roles change.
- If using cloud integrations, route tokens through a managed auth proxy such as Composio Managed Auth. This prevents direct (opens in new tab) key exposure.
You should now have all critical secrets protected from accidental leaks. Think of it like locking every door before leaving home, rather than just hiding the spare key under a mat.
Checkpoint: Before continuing, confirm no raw tokens are left in config.yaml or any shared scripts.
Following these steps means you securely setup openclaw clawdbot from day one. Not after something goes wrong later.
For more best practices, see Composio's secure OpenClaw guide (opens in new tab) to avoid common automation pitfalls.
When done correctly, your bot will operate safely. Internet access is limited only to what's necessary. You won't risk sensitive data exposure during initial setup or future updates.
Step 2: Harden Security for OpenClaw Clawdbot
You've set up the basics of your bot. Lock everything down before you go live.
Configuring Network and Firewall Rules
Start by restricting which doors are open to the world. Only leave what's essential.
- Allow only required ports:
- Open port 443 (HTTPS) for encrypted web traffic
- Keep port 80 (HTTP) closed if you use SSL everywhere
- Deny all unused ports by default
You should now see only port 443 listed when running sudo ufw status. At this point, your server will reject non-encrypted traffic. This is a must for any secure openclaw setup.
docker pull openclaw/clawdbot:latestCheckpoint: Verify that unnecessary ports are not listed as "ALLOWED" before continuing.
Should you block port 80 and 443? Never block both. Your bot needs one to talk to the outside world securely. Always keep at least port 443 open for secure connections.
A Composio guide (opens in new tab) shows how managed auth prevents direct key exposure vs. raw handling.
Securing Data and Access Permissions
Next, treat your files like valuables in a safe. Only trusted hands get access.
- Set strict file permissions. Store sensitive keys in
/etc/openclaw/keyswith mode600:
```bash
sudo chmod 600 /etc/openclaw/keys/*
```
Only the owner can read or write these files now. - Run Clawdbot under a dedicated user account:
- Create a new user with no shell access:
```bash
sudo useradd --system --no-create-home --shell /usr/sbin/nologin clawdbot
``` - Change ownership of bot files:
```bash
sudo chown -R clawdbot:clawdbot /opt/openclaw
```
- Configure role-based access control within Clawdbot:
- Assign admin privileges sparingly
- Use "read-only" roles where possible
- For example, grant API write permissions only to service accounts
At this point, your data is shielded from accidental leaks or privilege creep. This is a key part of securely setup openclaw clawdbot best practices. Youtube tutorial (opens in new tab) covers this too.
Checkpoint: Attempt unauthorized access as a different system user. You should receive "Permission denied."
Remember: To secure your deployment fully, combine network isolation and strict permissioning. It's like locking both your doors and your safe each night.
Step 3: Verify and Test Your Secure Deployment
You've installed, hardened, and locked down your environment. Now comes the moment of truth. Test if you've securely setup OpenClaw Clawdbot. This step is about running the bot safely and checking for security gaps before opening the doors to real users.
Running OpenClaw from Terminal
Start by launching OpenClaw Clawdbot directly from your terminal. This hands-on approach makes troubleshooting easier.
- Navigate to your OpenClaw install and directory:
```bash
cd /opt/openclaw
``` - Start the bot using the provided start script:
```bash
./start.sh
```
Or if you used Docker during installation:
```bash
docker compose up -d
```
At this point, your terminal should display logs. All services should initialize without errors.
Checkpoint: Look for a message like OpenClaw Clawdbot running on port 8080. If you see permission denied or missing config errors, check file permissions and environment variables.
Common question: Is OpenClaw the same as ClawdBot? Yes. The project rebranded but core functionality remains unchanged. You might still see both names in scripts or documentation. For best practices on deploying OpenClaw in Docker securely, review the OpenClaw guide (opens in new tab).
Checking for Security Gaps
Once Clawdbot is running, shift focus to active testing. Think of it like pressure-testing a new vault before storing anything valuable inside.
- Attempt to access your deployment from an external network. Use a browser or command-line tool like
curl:
```bash
curl http://your-server-ip:8080/
```
You should receive either an authentication prompt or access denied message. - Run a port scan with Nmap to confirm only approved ports are open:
```bash
nmap -p 22,80,443,8080 your-server-ip
```
Only ports needed for operation should show as open. - Try logging in with invalid credentials. The system must reject unauthorized attempts without revealing sensitive details.
Checkpoint: Verify there's no way to bypass login screens or reach admin panels without proper authentication.
A Composio guide (opens in new tab) warns one misconfiguration exposes all your keys - attackers scan GitHub daily for 12.8M leaked secrets.
If you spot any unexpected access points or warning messages in logs, halt usage immediately. Go back and revisit config files. Look for errors like "Unauthorized request" or "Token missing."
You have now verified that you've securely setup OpenClaw Clawdbot on your system. It's ready for production use and shielded against common threats.
Conclusion
You've navigated the twists and turns of securing OpenClaw. You avoided pitfalls. You locked down access. You set up defenses that many overlook.
API key leaks and loose permissions are common missteps. But you now know how to spot them early. Rotate credentials often. Restrict user roles. Store secrets outside your codebase. When something feels off - unexpected errors or strange log entries - act fast. Scan your audit trails. Double-check config files for mistakes.
If you hit a wall or see odd behavior in deployment, don't go it alone. The OpenClaw community on GitHub is active and responsive. Detailed documentation is available for every major update. Check the official docs first. For urgent help with vulnerabilities or unclear issues, connect directly with security experts. Use trusted forums like Stack Overflow or dedicated Discord channels.
Keep this momentum going by scheduling regular audits. Monthly reviews catch more than annual ones ever will. Automate dependency checks using tools like Dependabot or Snyk. Outdated packages will never sneak past you unnoticed. Update firewall rules when adding new features. Revisit permissions after team changes.
The payoff? You're not just running a bot. You're safeguarding your users' trust and protecting your own peace of mind.
In security stories, heroes aren't the ones who never make mistakes. They're the ones who double-check doors before turning out the lights. Stay vigilant. Keep learning from each challenge. Let your secure setup be part of a story worth telling forward.
Still unsure about your setup? Our developers spot security gaps before attackers do. Let's talk (opens in new tab).

Justas Česnauskas
CEO | Founder
Builder of things that (almost) think for themselves
Connect on LinkedIn

